Wednesday, January 29, 2014

Make and Take Craft Weekend January Tshirt Quilt Weekend

We just wrapped up our first T-shirt Quilt Weekend and it was such a blast! All of our guest left with a finished rag T-shirt quilt and they were all spectacular!

We started off our Friday night with a very delicious dinner and then it was time to start cutting out the T-shirts. We figured out what size everyone was going to cut their squares and they were busy cutting all their shirts into squares. We provided the batting and cotton backing if they wanted to use that or they could choose to use the backs of their T-shirts. It was a late night and everyone got all their squares pinned together with the batting and backing.

Joette cutting her daughter's high school T-shirt

Kristen cutting out Race for the Cure shirts.

Kim did an all sports quilt: Mizzou, Cardinals, Rams and Blues.
Saturday morning was a yummy breakfast then it was off to start sewing their blocks together. They then laid their blocks out to figure out their layout. Once they had their layout then it was back to sewing the quilt together. Taking a break for lunch and snacks, they sewed all the blocks together and then it was on to snipping to make the the rag quilt.


Kristen used pink binding to finish her quilt to add that pop of color.


Such a fun weekend with good food, great friends and 3 finished T-shirt quilts! Also we had our first guests take the Amtrak train from St. Louis to Washington.


We are thinking of having another one but it's soon. February 7, 2014 at 5pm until February 8 at 5pm. The T-shirt Quilt night includes lodging for Friday night, 3 meals, snacks and drinks, supplies to make your quilt all for $225.. All you have to bring is your overnight items, your T-shirts and be ready to have a great time! Go here to register.

Thursday, January 23, 2014

Frozen Inspired

I'm just gonna say it, "I pretty much stink at this blogging thing!" I have all the intentions of writing up different posts but then I find myself wanting to create things instead of documenting every little thing I do! So this will be a random posting schedule until I can figure some thing out and I just decided to start selling children's clothing that I make. I'm starting out small with just a Facebook page called A LOT of ATTITUDE! So I have been busy with that as well and have already had a few orders which is so exciting!

I don't know about you but we have seen the movie Frozen, twice and my kids are running around the house singing the soundtrack so I thought I'd better whip them up some play dresses! Anna's dress was easy, I just followed the colors and made it a peasant style so it's easy on and off for them. Elsa's was a little harder because it looks sheer and that my friends is not something I wanted to mess with for dress up clothes! I found the blue lace on sale at Hancock's and thought that would be a great overlay. I should have used a silver ribbon on the bodice but I used what I had, sometimes you just need to use what you got! I thought they turned out great! Easy on and off, no glitter of any kind and I bet they last much longer than the ones you buy at the stores!


Friday, January 10, 2014

Handmade Holidays 2

Since I have so many gifts to show and thought it crazy to make a post for each one, I've divided the gifts given by families to cut down on the amount of posts!

These handmade goodies were made for some of the nieces and nephews on my husband's side.


The vest/tie onesies were from a pattern I drafted myself based on the onesies I had on hand. I used my favorite sewing tool, aisle runner from the bridal department, to trace the shape of the neck line and sleeves, then drafted my pattern from that. What's cuter than a baby in a onesie that looks like a suit?! The material used was from Jo-Ann's and I used Steam 2 Steam to iron the vest/tie onto the onesie then sewed around the edges. Some I used a zig zag stitch and others I just used a straight stitch. I added the buttons after that.


This dress was made for P who has a lot of spunk in her! All the material used was from Ace Hardware and the shirt was from Target. This is a modified version of CKC Cosettes knit and woven dress pattern. Instead of making my own bodice piece I used an existing t-shirt but my sash is still attached to the dress. I had already cut out my woven pieces when I realized my sash was in pieces so I worked some sewing magic and had to figure out a way to sew it on.


This top is made for my niece F, using fabric from Ace Hardware again! I do love this top pattern, how cute will it look with a pair of leggings! This is CKC Maisy's ruffle top pattern, made with 3/4 length sleeves. For all the nieces I paired their outfits with a necklace from Cookie Crumb Couture, I actually had the necklaces first and then found material to match them!

Thanks for stopping by and come back tomorrow to check out more handmade gifts!
 
Sew Much Ado

Thursday, January 9, 2014

Handmade Holidays

Now that the holiday's are over and my kids are finally back to school after this crazy blizzard Missouri had last week I can maybe get some things finished! I love my kid's but a routine is the way to go and we all needed things to get back to a routine!

This is going to be a series on everything I made for Christmas gifts this year. I tried to make most of my gifts since I tend to hoard fabric like crazy and needed to work on getting rid of some of it. So every day I will post a picture of something I made for a gift.

First up, I have a ton of nieces and nephews on my husband's side and instead of getting them all toys I made them a piece of clothing. I hope they know how much love goes into making someone else clothing. When I make things for others I tend to over think the fabric selection and what pattern I will be using!

This is the outfits I made for my beautiful niece, H, who we don't get to see as often as I would like to! I hope she enjoyed her Christmas outfit and a little dress I made her for their vacation to Hawaii!


This Christmas outfit was used with corduroy fabric I found at Hancock Fabric's. The black and red have little Scottie dogs on it and then there's the black and white houndstooth. The pattern for the skirt is CKC's Amanda's triple ruffle skirt. I love this skirt, it's so cute and you can change it up so many ways using 1 to 4 different fabrics. The turtle neck I picked up at our local Wal-Mart and I found the little Scottie iron on at our Ace Hardware, that carries fabric. I sent this with a pair of red tights for her to wear for Christmas.


This dress I made because they are going to Hawaii and I've had this fabric sitting in my stash forever! I picked it up at our local resale shop, I think it was 4 yards for $2, it was a light weight cotton that I thought would make nice summer dresses. I think it looks very tropical and perfect for a Hawaii beach day! I used the CKC Lorelai's pattern but modified the skirt part omitting the ruffles and using just one fabric. The bodice material I picked up at our Ace Hardware and it's sort of a camo print but it matched the flower fabric prefect.

Check back tomorrow for my next handmade gift tomorrow! Thanks for stopping by!

Thursday, December 19, 2013

Holiday Tradition Series Part 2

The Lady of the Snows Shrine

This tradition started when my oldest was 2 and she was obsessed with Baby Jesus. We had to drive around every night looking for nativity sets so she could see Baby Jesus. We also purchased the Fisher Price Nativity Set so she could have her own Baby Jesus to play with. We could set forever after church just so she could sit by the huge manager scene and see Baby Jesus. It was the cutest thing ever and nice because Santa and toys had not become a bigger part of Christmas for her yet.


That year my Mom and I drove to The Way of Lights at The Lady of the Snows in Belleville, IL, so she could see the story of Baby Jesus in told by lights. We start out at the petting zoo where they can feed the animals carrots and ride a pony, donkey, or camel (we've never done it, my kids have never asked). After freezing while feeding the animals we hit the kettle corn stand and grab our snack for the hour or so ride back home. They have a building we go to next where we enjoy a buffet of roast beef and fried chicken for dinner with any side you could think of. Every night they have different choirs from all over performing different types of music. After dinner we check out the Christmas trees that are always decorated according to the theme, this year the theme was Christmas songs and each tree was decorated according to a certain song. The kids love the Children's Village which includes Legos for building, nativity sets for playing with, a few different art projects to work on and a puppet show. Before we head back into the car to continue our drive through the lights we always peek in the gift shop, both of my older kids have bought a Baby Jesus the first time going to the Shrine. This year my oldest, L, was interested in the angel Gabriele, so we found her a necklace and she hasn't taken it off since we left. There is also a laser light show, which we went to last year and they have a photo booth where you can get dressed up like an angel. We of course did this with my daughter the first year!


We jump into the car after all that, continue through The Way of Lights to end at a life size manager, that you can go right up to. My kids in the past have made birthday cards for Jesus and written him notes to leave at the crib. I look forward to this tradition every year now, we just went for our fourth year this past week, because I know someday my kiddos aren't going to want to hang out with their Mom and Grandma and look at some white lights. Right now though they think it's pretty amazing and get so excited when it's time to go. L and T were very concerned that my youngest, O, didn't get to go this year but we have a rule, you must be 2 to attend. At the end you can give a donation and get a stuffed animal, which changes every year, and they really wanted to get 3 so O could have one as well. I told them as sweet as that was, she could wait until she gets to go next year to get her first stuffed animal from the Shrine.


Wednesday, December 18, 2013

Holiday Traditions Series....

Since I can't really post any of my projects I'm working on because all of them are Christmas gifts, I thought it would be fun to do a write up on all the different holiday traditions I have going on with my family. Each day I'll highlight a different tradition that we currently celebrate at our house with my kiddos.

Magic Tree

This is a newer tradition that my kid's love. My youngest brother is working and going to school in Columbia, MO and they have this tree this man decorates with 1,000's of lights. It is such an amazing sight and you just can't help but feel a little bit of the Christmas magic while under the glow of all the different colored lights. We make an evening of it, going to visit and dine with my brother, then heading out to see the Magic Tree. It really is breathtaking and just a fun thing to do since we get to hang out with my little brother. The kids get to run around under the tree and this year we froze our butts off! My youngest was not too thrilled about being so cold but the older 2 could care less!

Me and L, O and T!

My Mom and O checking out the different colors.

Me and O!

My youngest brother with O and T.

My brother with O, his goddaughter!

My pictures don't do it justice! It really is a magical place and I hope this is a tradition that will continue! If you live near Columbia, MO I would suggest checking it out, just remember to dress warm and bring your hot chocolate with you!

Until tomorrow...

Sunday, December 15, 2013

Daisy Meeting

I'm the group leader for my daughter's Daisy troop and this month we had to move our monthly meeting due to the Christmas concert. I, of course, moved it to The Craft House for an afternoon of mother/daughter crafting time!

We made up bags to take to our parish food pantry that contained everything needed for a family to make Christmas sugar cookies. The girls decorated the bags and the recipe cards then we included all the dry ingredients along with cookie cutters and sprinkles. The girls made a cute owl ornament to take home and then the Mom's were surprised by having to sew! The girls got to pick out their material and the Mom's got to sew and make a headband for them. Can I just say I dropped my daughter off at school the next morning and all the girl's from her troop were wearing their headbands! How cute.


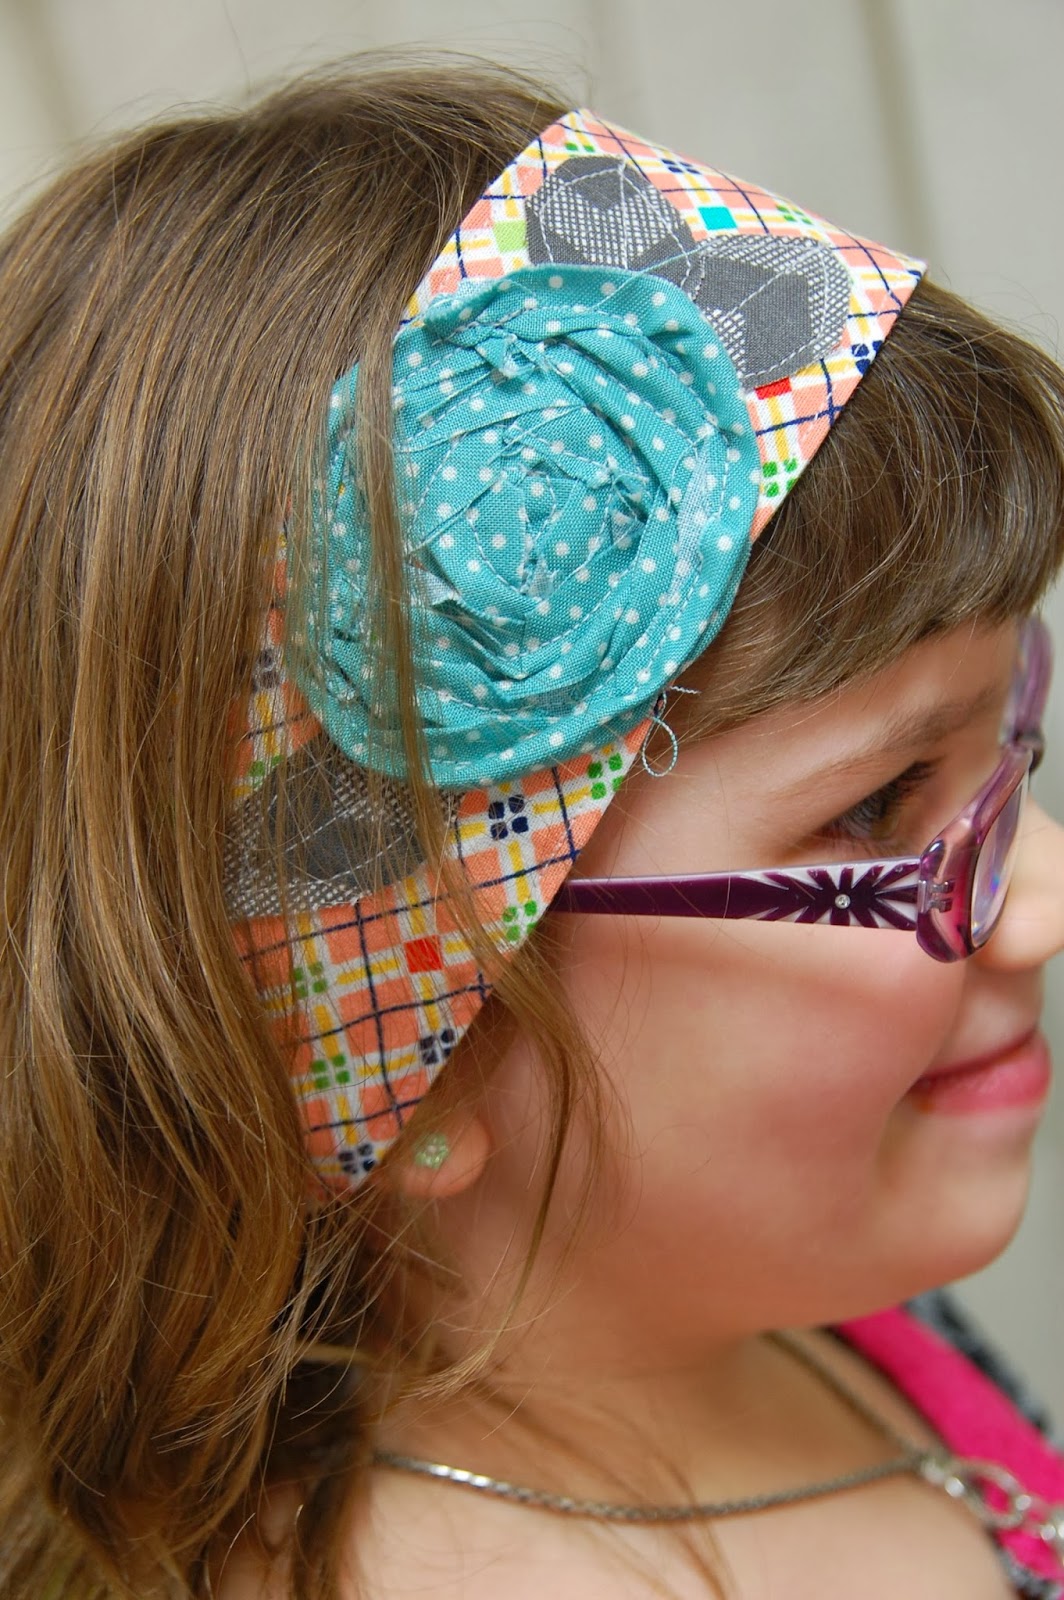
Here's my L wearing the example I made for the Mom's to look at. This one I cut 2 strips, 3 inches by the length of the material but I thought that was too wide for the younger girls. I ended up cutting each strip 2.5 inches by the length of the material. Each girl picked out 2 different prints of material, then we sewed right sides together, both long sides and one short side. Turned the tube, pressed and folded in the raw edges on open short end and topstitched all four sides. The leaves I just free handed and then sewed them on very messy like. The flower is just a 3/4 inch strip of material that I started in the middle and just twisted as I sewed onto the headband.


Here's a group shot of all the wild and crazy girls having fun together. It was a loud but fun event and I think some Mom's walked away with a little more knowledge on sewing!

Friday, December 6, 2013

November Sewing Class #4

We just wrapped up our November Sewing Class by making some very functional pajama pants, 2 of the ladies couldn't make it to the last class so Lindsay got a one on one lesson. She picked out the cutest flannel to make herself a pair of pj pants. I hope they keep her nice and warm this holiday season! The pattern we used is New Look 0295 and these have pockets in them, I'm a big believer in pockets for everything especially when you have kiddos and you're always carrying things around.


She was taking them home to finish hemming them so they would fit her perfectly! I had do much fun doing another Sewing Class, I will be adding some more classes after the first of the year so watch the website for those listings. If you have a group of friends that would like to take a class together please email me and I would gladly work with you all to set something up.

Tuesday, December 3, 2013

Wine Glass Coaster Tutorial

Well here it is the first tutorial on the blog....

This comes from the craftiest person I know, my Mama! She whipped some of these up the other day and I thought they were so cute, so we got together and took some pictures of the process.

Wine Glass Coasters


Supplies needed:

Material
Very thin batting
Sewing machine
Pinking shears


The 4 yellow pieces are my top and the blue is my bottom. The one already made uses 2 browns, 1 blue and 1 yellow piece.


Cut 5 5x5 inch squares  (4 for the top pieces and 1 for the bottom)
Cut 1 5x5 inch square of a plain cotton (I used some leftover white sheet)
Cute 1 5x5 inch square of a very thin batting (I used drapery lining I had gotten from my aunt but I think flannel would work also )

 Take your 4 top pieces and press them in half wrong sides together.


 Stack your squares with the plain cotton on bottom, batting in middle and bottom square on top with right side up.


 Start to lay out your top pieces on top of stack of squares. You want your raw edges to line up so your fold is in the middle.


 Place the second top piece like this, again with raw edges on edge and fold in toward middle.


 Lay your third piece down, making sure raw edges are to edge.

To add your 4th and final piece you have to lift up the corner of your 1st piece and put the 4th piece under the 1st. Make sure raw edges are to the edge and folded part is in toward middle.

Pin all pieces together, take the whole stack and sew all around the edge using a 1/2 inch seam.
Using a pinking shear, pink around all the edges ad cut the corners.

Turn the whole thing inside out so that your top is up and your bottom piece of material is on bottom, using a chopstick or knitting needle push all corners and sides out. Press and that's it. Make up a set using coordinating but different fabrics so guests can easily remember what wine glass is theirs.


There you have it! A quick and easy sew that can use up your scraps or make it even easier by using 5x5 quilting blocks all ready cut for you! We packaged it in a set of 4 with a plastic wine glass from The Dollar Store in the top one so people could see how they are used. I'm making a few sets for teachers and family members for Christmas.

Enjoy and thanks for checking us out here!


Skip To My Lou